JProfiler直觉式的GUI让你可以找到性能瓶颈、抓出内存漏失(memory leaks)、并解决执行绪的问题。它让你得以对heap walker作资源回收器的root analysis,可以轻易找出内存漏失;heap快照(snapshot)模式让未被参照(reference)的对象、稍微被参照的对象、或在终结(finalization)队列的对象都会被移除;整合精灵以便剖析浏览器的Java外挂功能。
测试环境
1、本地采用WIN7 64位操作系统, JProfiler 7.1.2 for windows(安装包: jprofiler_windows_7_1_2.exe);文章源自陈学虎-https://chenxuehu.com/article/2016/05/5202.html
2、服务器centeros 6.4 ,JAVA 1.7.0 ,apache-tomcat-7.0.62, JProfiler 7.1.2 for linux(安装包: jprofiler_linux_7_1_2.sh)文章源自陈学虎-https://chenxuehu.com/article/2016/05/5202.html
本机JProfiler安装
这个就不多说了,一路NEXT就OK,我们本地采用7.1.2版本。文章源自陈学虎-https://chenxuehu.com/article/2016/05/5202.html
服务器环境安装
1、在服务器上建立文件夹:文章源自陈学虎-https://chenxuehu.com/article/2016/05/5202.html
mkdir /opt/jprofiler7文章源自陈学虎-https://chenxuehu.com/article/2016/05/5202.html
2、将 jprofiler_linux_7_1_2.sh文件上传到服务器,给权限,并执行安装:文章源自陈学虎-https://chenxuehu.com/article/2016/05/5202.html
cd /opt/jprofiler7/文章源自陈学虎-https://chenxuehu.com/article/2016/05/5202.html
rz文章源自陈学虎-https://chenxuehu.com/article/2016/05/5202.html
chmod +x *.sh文章源自陈学虎-https://chenxuehu.com/article/2016/05/5202.html
./jprofiler_linux_7_1_2.sh -c文章源自陈学虎-https://chenxuehu.com/article/2016/05/5202.html
按照提示来安装,提示都很简单,不在多说。
注意,这里的 -c 意思是用字符方式来安装,如果机器上没有 图形界面 则加上该参数.
注意安装的路径的修改,看下图:
第一步: 输入 o 回车
第二步: 输入 2 回车,意思是自定义,可以在后面改就安装路径。
选择安装路径:
然后就是一路 ENTER,部分需要输入,自己看下就能明白,就不详细的写了。
客户端连接配置
这里我就不写了,按照截图一步步的跟着做就好了,不明白的童鞋可以留言讨论。
选择 Session->Integration Wizard->New Server Integratation
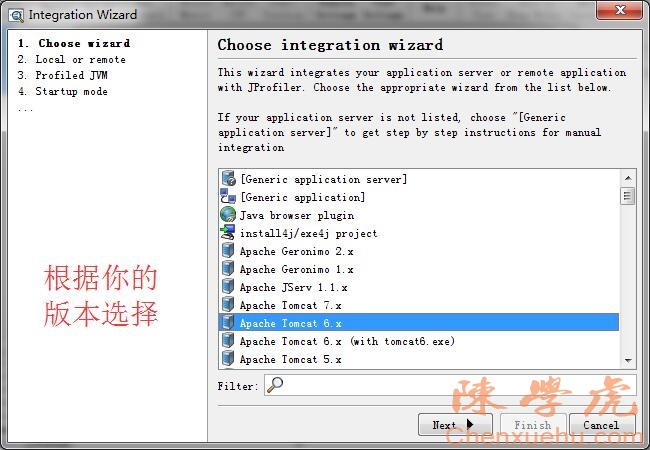
选择 Apache Tomcat 版本
选择 On a remote computer; Platform of remote computer 选择 Linux x86/AMD 64 ,对应您的服务器信息
选择服务器的 JDK 环境,这里是: Oracle, 1.7.0, hotspot, (注意是 32 位或 64 位)
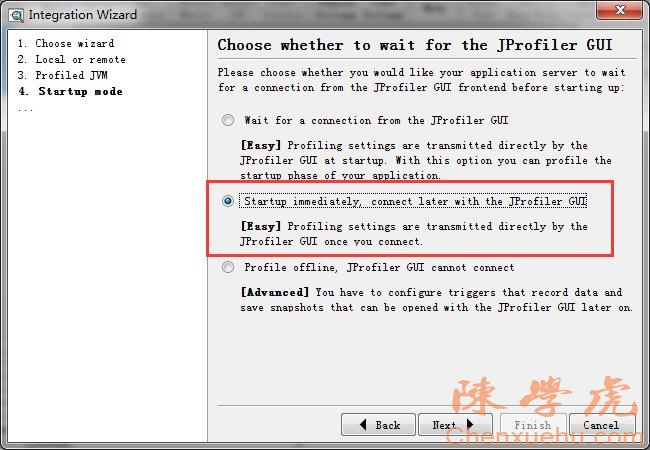
选择启动模式
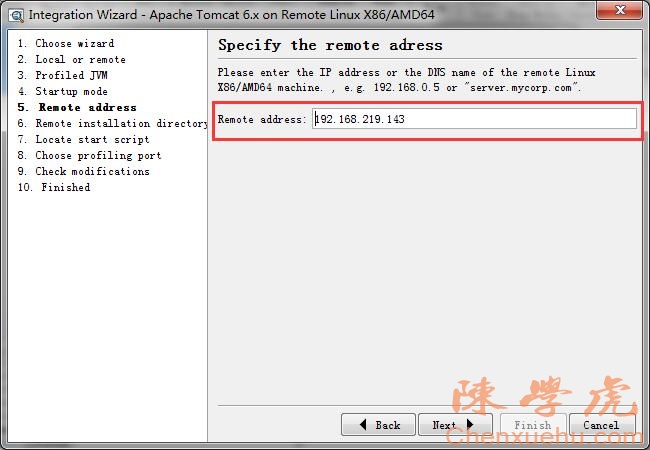
输入服务器 IP
输入服务器上的 jprofiler 的安装路径,如 /opt/jprofiler7 ,用于加载模块
择客户端本地 tomcat 的启动脚本,例如: E:\tomcat-6.0.18\bin\startup.sh,做为修改的样本。
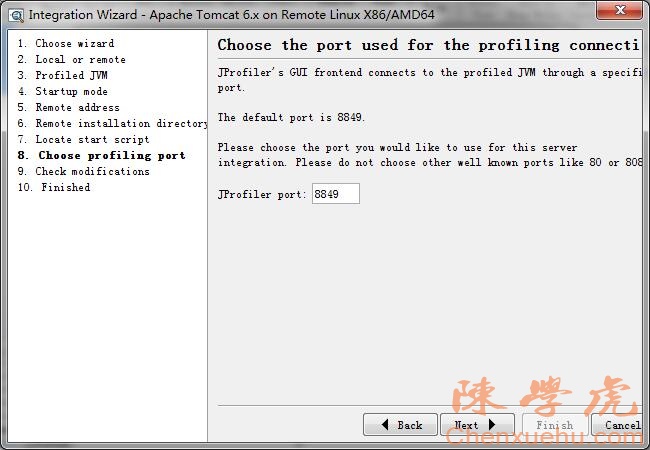
输入端口:这里是默认值 8849
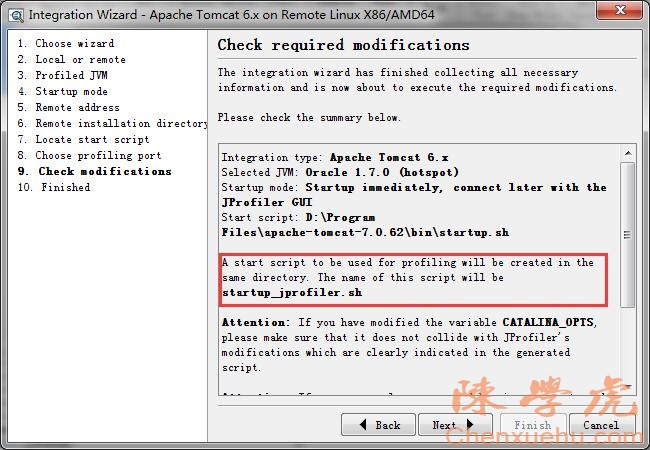
这里会列出需要在服务器端做的配置:核心内容是说在 E:\tomcat-6.0.18\bin\目录生成了 startup_jprofiler.sh,把它 copy 到服务端 Tomcat 的相同目录中,用来启动 Tomcat,下面有说明。
选择是现在启动呢,还是稍后启动,这里建议选择稍后启动,因为还要去服务器配置,不过配置好了就直接启动了,省事。
服务器连接配置
我们需要将在本地生成的startup_jprofiler.sh文件传输到服务器上 Tomcat 的相同目录中。即:
本地:
D:\Program Files\apache-tomcat-7.0.62\bin\startup_jprofiler.sh
服务器:
/usr/local/tomcat7/bin/startup_jprofiler.sh
测试环境
1、服务器启动startup_jprofiler.sh
/usr/local/tomcat7/bin/startup_jprofiler.sh
看到类似以下信息就表明成功启动了:
Server startup in 22481 ms
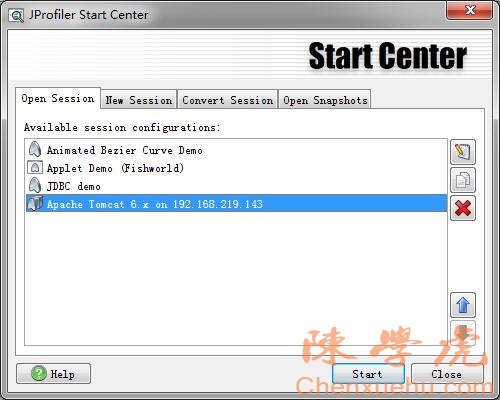
2、启动jprofiler并连接
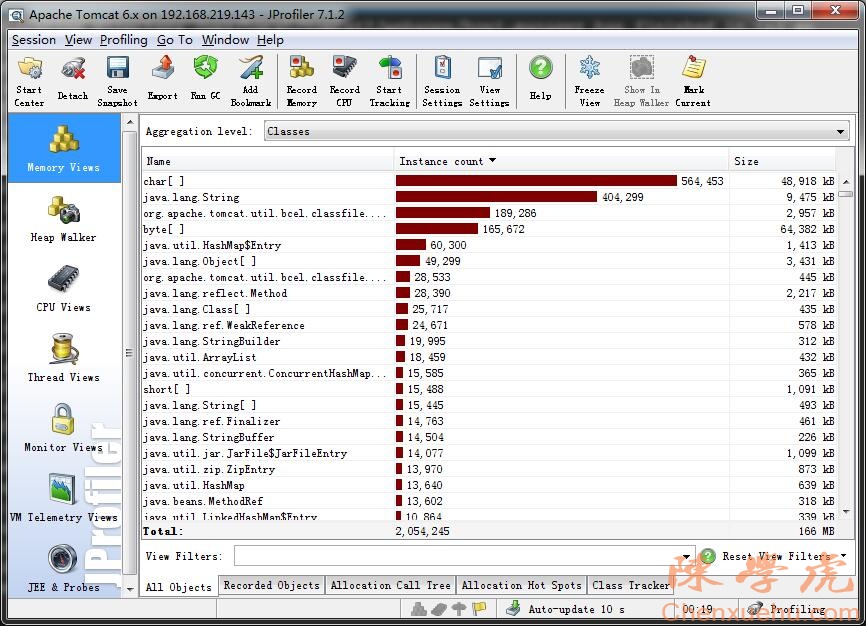
3、成功连接
4、成功连接后,服务器会打印信息:
JProfiler> Using dynamic instrumentation
JProfiler> Time measurement: elapsed time
JProfiler> CPU profiling enabled
JProfiler> Updating configuration.
JProfiler> Retransforming 1048 class files.
JProfiler> Configuration updated.
小伙伴们,到这里,Jprofiler远程监控Tomcat之环境配置就完成了,接下来就该监控了。













评论